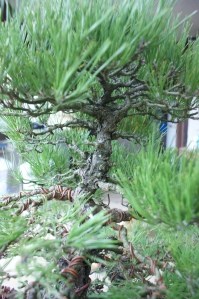
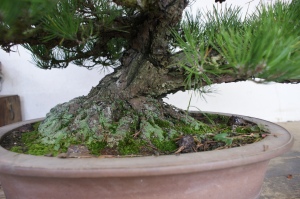
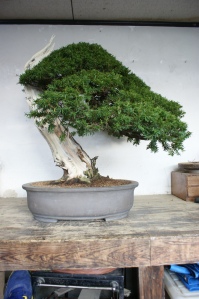
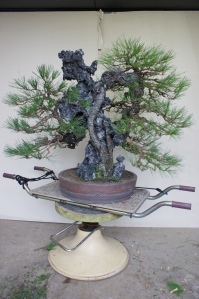
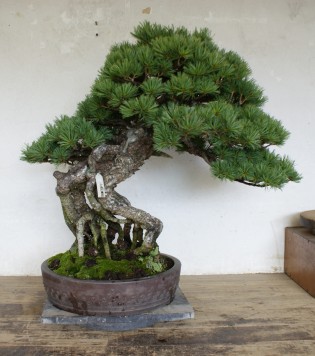
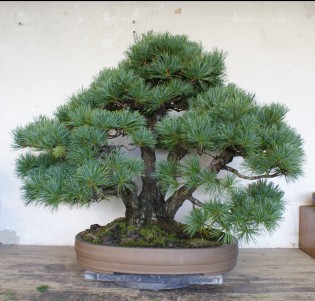
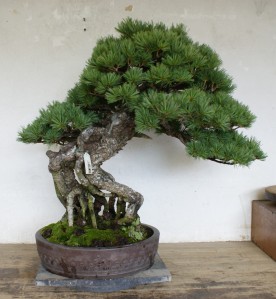
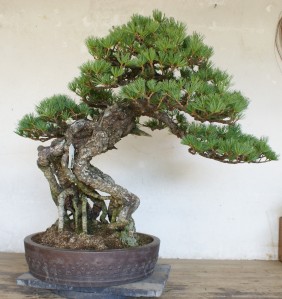
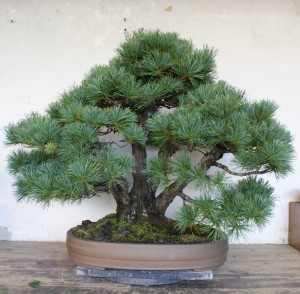
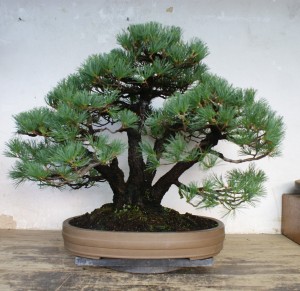
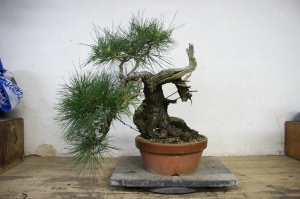
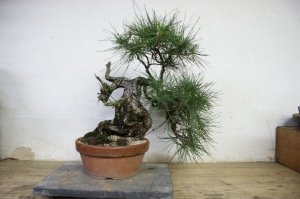
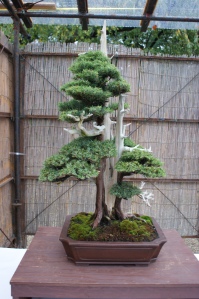
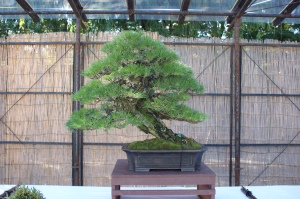
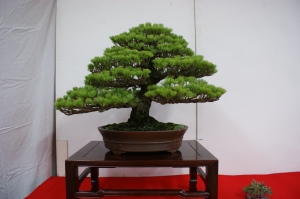
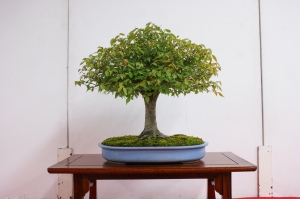
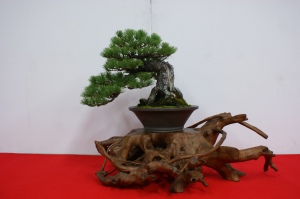
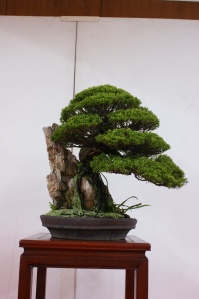
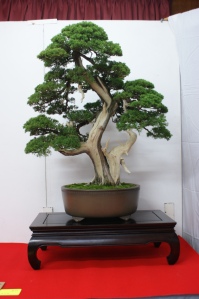
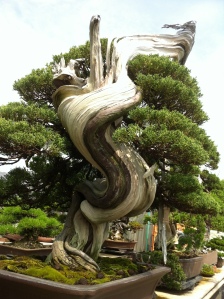
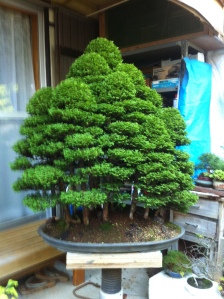
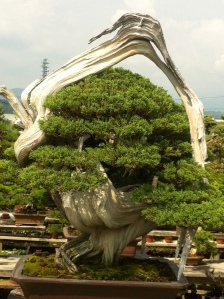
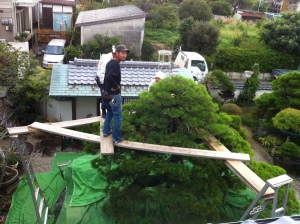
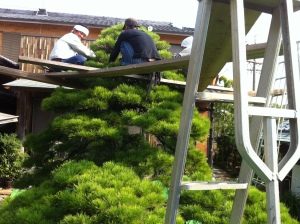
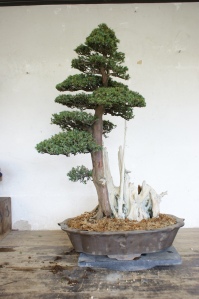
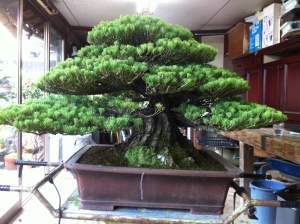
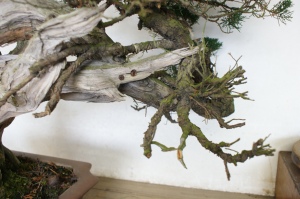
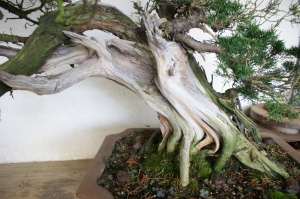
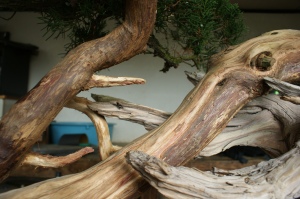
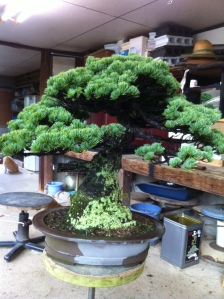
Japanese Black Pine tree (Pinus thunbergii)

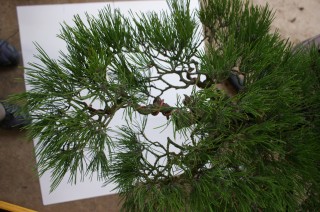
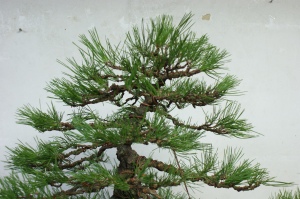
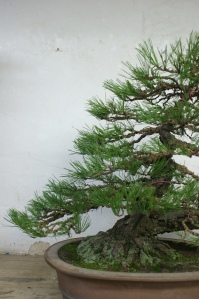
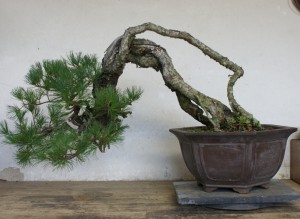
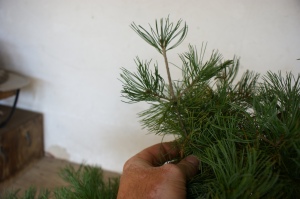
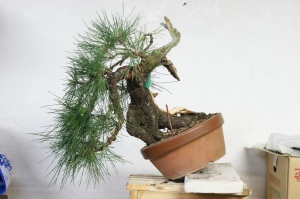
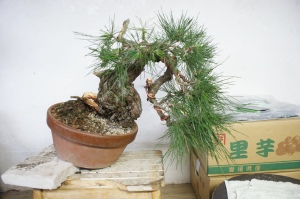
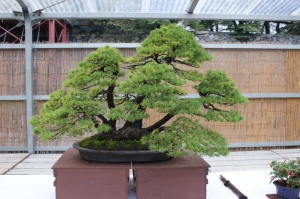
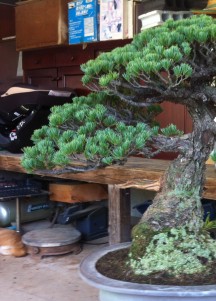
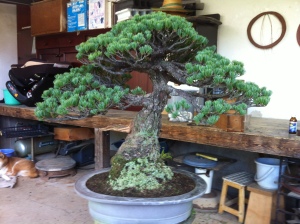
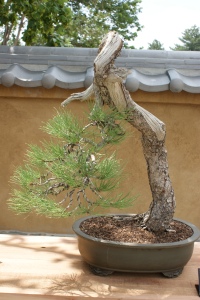
Next up in the workshop is this Japanese Black Pine tree (Pinus thunbergii). This is one of the first trees I worked on when I was here at Daijuen, in January. I was removing the old needle growth then, but today I get to style this tree. It’s always nice to revisit a tree I had worked on in my previous trip. There is a familiarity to the tree and it’s nice to see how the tree has responded to the work I had done previously.

SONY DSC

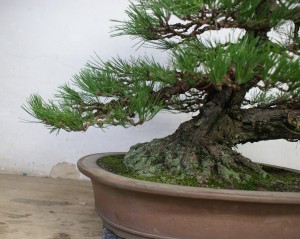
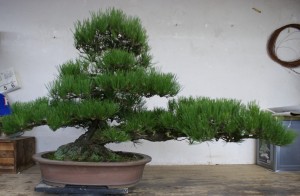
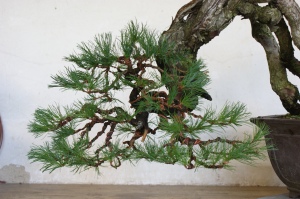
In contrast to the mostly informal and formal upright style of the black pines at Daijuen this tree is unique.  The large dominant first branch is more common in the white pines around the nursery, but suits this black pine tree nicely.

      SONY DSC             SONY DSC

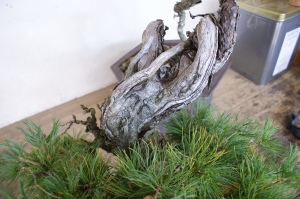
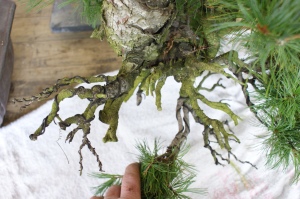
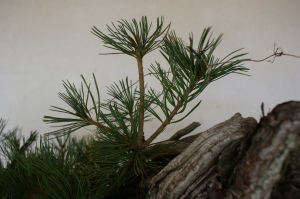
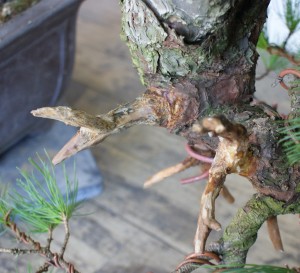
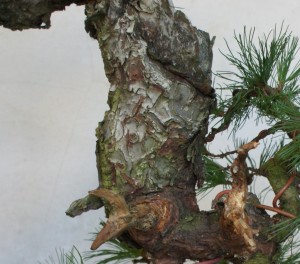
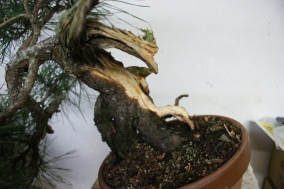
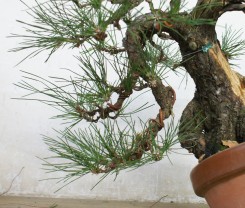
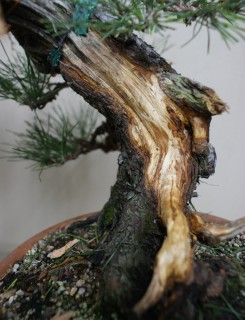
I really like this tree and its style but I know it can be improved upon. I like the nabari and how the trunk line comes up and splits off to the first branch. There is some very nice bark layers built up  on this tree as well. The tree is in good health and has produced a lot of nice buds this growing season.

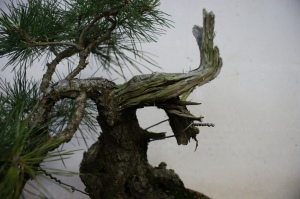
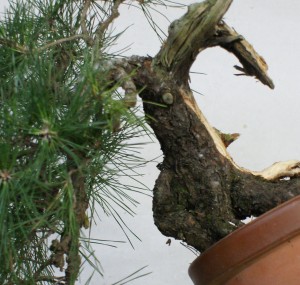
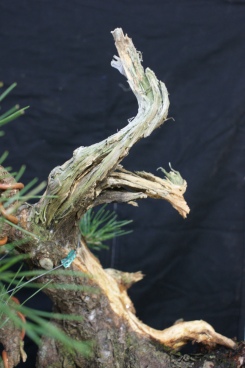
The areas in which I feel the trees need some improvements starts with the main trunk line. The trunk seems to be disconnected from the large first branch on the right and the second branch, which is on the left side of the tree. These two large branches are on opposite sides at roughly the same angel and the trunk line just splits the two sides. It makes the tree seem like it lacks depth, which it does not. Another point of concern is just below the apex where a few branches have died, exposing a very straight trunk line. I think that with a few bends on the larger branches, some pruning and a lot of refinement work this tree will have a much more cohesive feel and design. It will allow your eye to flow around the tree as you take it all in with a continuity it currently lacks.

     SONY DSC    SONY DSC

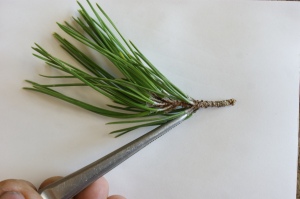
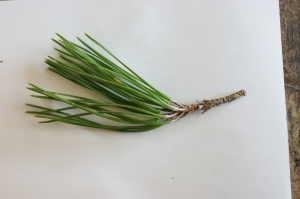
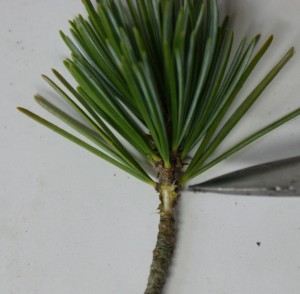
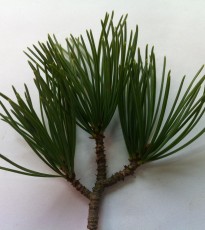
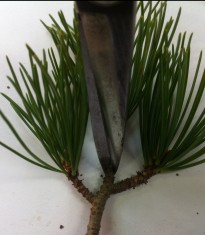
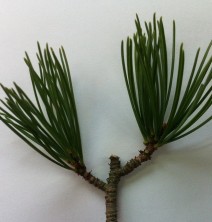
I first remove the old needles by pulling them with tweezers. The needles can also be removed by cutting them or pulling them by hand. Remember to always pull the needles in the direction they are growing, and avoid pulling them out in clusters. Pulling them either away from their normal growth or in clusters will increase your chances of tearing away some of the bark from the branch. Doing so will weaken the branch and prevent back budding in that area. While this is being done I also remove any branches that won’t fit in the design.

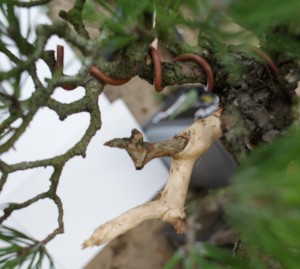
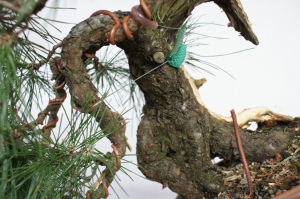
Next I start wiring the first branch but feel like it is just a little long for the tree. I decide to remove some length, making the branch more compact and connected to the main trunk.

SONY DSC   SONY DSC

With the branch                                                            what’s left of the branch
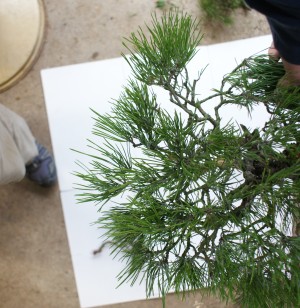
SONY DSC    SONY DSC After branch removal, before wire                               New first branch with wire

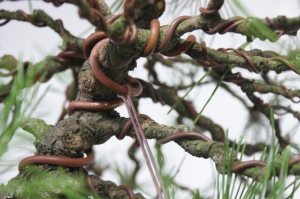
Next was the second branch, which was pulled down to mimic the trunk line and wired. You can see that now the branch and the left side of the nabari and trunk line are running more parallel to each other giving them a sense of unity.
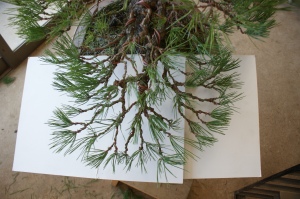
   SONY DSC       SONY DSC

SONY DSC

In order to make the apex feel more in tune with the entire tree I used a guide wire to pull it down and too the right. Pulling the apex out over the first branch and keeping the branches moving up on that side really brings those two main features of the tree together and gives it direction. The downward sloping of the left side of the tree now compliments the right side motion.

    SONY DSC      SONY DSC

             SONY DSC                       SONY DSC

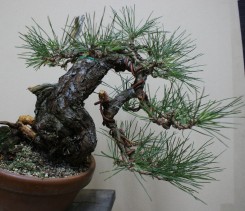
When you bring it all together, here is the finished product. I hope you agree it’s a more compact and cohesive design, in slant style.
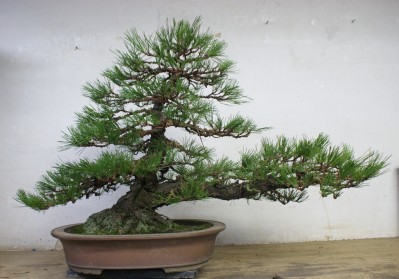
SONY DSC

SONY DSC

I have recently left Japan, and am back in Maryland now. It was another amazing experience on my bonsai journey. I am so thankful for my Oyakata (Mr. Suzuki) for allowing me to continue my bonsai education with my second trip to Daijuen. I don’t want to give to much away because I am working on a number of posts one of which will be on Daijuen.  I will be wrapping up of my thoughts on my apprenticeship experience, pictures of the nursery and more. I also have several other trees to post on including some stuff from the Taikan-Ten show. Here are some pictures of future post, so check back ( or click on the “follow” tab) as the adventure continues!!! Thanks so much for reading, hope you enjoyed it.

SONY DSC

Shimpaku Show prep for Meifu-Ten

SONY DSC                                       SONY DSC

Yew, work before Taikan-Ten                                     Twin Black Pine on a big stone

as seen in Peter Tea’s latest post. Thanks Peter!

Posted in Uncategorized | 2 Comments

Five Needle Pines

A few weeks ago I was given a group of Five Needle Pines to work on. In this post I will discuss some maintenance work and styling of a group. They are all very nice trees and are owned by one of Mr Suzuki’s best customers. Before coming to Daijuen I didn’t have a lot of experience with Five Needle Pines. I have grown quite fond of them since having the opportunity to work with them this year. I really like the foliage, and variations in color from tree to tree.You can see the needles on the tree on the right have a nice blue color too them. The ones on the left are a bit more green. They also have nice exfoliating bark and like other pines are quite limber. They can be styled in just about any style except broom style.


This time of the year I have been removing last years growth, doing some light pruning and styling some of the five needle pines.

The first order of business is removing last years growth. On these trees I have been cutting the old needles off in stead of pulling them by hand, or with with tweezers. All are acceptable methods if done properly. Techniques may vary from species to species. Here at Daijuen we almost exclusively pull Black Pine needles with tweezers. On the other hand we cut the majority of the white pine needles because they tend to pull the bark off more easily. In this instance the needles were tough and the bark was tender so cutting them decreases the chance for tearing the bark off the branch.


When pulling needles either by hand or with tweezers it is important to always pull the needles in the direction in which they are growing. It is also important not to pull too many needles at once.


Pulling the needles against the direction they are growing in, or pulling them out in clusters will greatly increase your chances of tearing the bark. These tears will prevent back budding in that area, weaken the branch and if enough of them happen can impact the health of the entire tree. If the tear goes around the entire branch then of course that individual branch will die as well. Every time you cause undue stress and damage to your tree it can have an impact on the over all health, and it’s development. As in some many aspects of bonsai (and life) take your time, do it right and you will always see better results.

As the needles are being removed, pruning is taking place at the same time. Removing dominant buds and cutting back clusters of buds helps to distribute the energy of the tree more evenly. An even distribution of energy will result in better overall health of the tree as well as giving it a more pleasing appearance. Pruning and removal of the old needles also lets more light get to the inner branches of the tree. This will encourage more back budding, enabling you to create a more compact tree.


As a general rule if you have three buds coming out at the same junction you will remove the center bud, which breaks the straight line giving you movement in the branch. In this instance the center bud also happens to be the dominant bud, so there is no doubt it must go. I like to leave a little nub when I cut these buds off, especially if the sap is still flowing. Doing this will allow the nub to dry out and die back without damaging the junction left behind. If you cut flush with the adjoining branch you may get die back into  branch you wish to keep. Next year all the dried up nubs can be removed safely.


Before                                                                            After


Before                                                                            After

That was as far as the work on these two trees would go at this time. However the third tree would also be getting styled. It was a very interesting tree and lucky for me was in need of some additional attention.


I really like these exposed root style trees and this one had a lot of character. It also had some issues to be dealt with.


When evaluating at tree before working on it I always try and start by finding the good qualities in the tree. Recognizing and accentuating the best qualities in a tree is important when styling. Sometimes that is hard because the bad qualities often stand out more and are easier to see. My mind starts to wonder how am I going to change or hide those bad qualities. However this tree had very cool exposed roots with nice old bark on them. It also had some very cool old natural dead wood.


Along with the good qualities this tree presented a number of challenges. There were two areas of major die off on the tree that had been previously wired. The branching was also  leggy and sparse in some areas. The areas where the branches had died back left large gaps with little branching to compensate at this time. The objective of this tree would be to set the remaining branches into place knowing in time further refinement will need to be done. I started by removing the left over wire and did what you do with dead branches, turn them into jin :). I then wired and placed the branches.


 I never saw this tree prior to the die off and unchecked branch growth. However this is the first step in returning back to it’s former shape. A number of the existing branches and buds will be cut away in favor of inner growth as it happens. The entire foliage mass could have been and should have been made tighter. However I left it “loose” on purpose to encourage more light to hit the branches, which will encourage back budding. I tried to bring some of the foliage back towards the pot providing a little more balance to the tree. There was really not much to work with in the back after all the dead wood was address. I utilized the remaining branches but in time that area will fill in a bit better as more back budding happens. It was a nice group of trees to work on, each one in different stages of their development. As always it was a pleasure to do what I love, in such an amazing place. Thanks for reading, hope you enjoyed it.

Posted in Uncategorized | Leave a comment

One night in the workshop

One night in the workshop

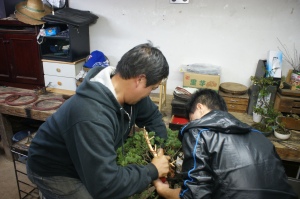
One night a couple of weeks ago we had a visit from Jun-Sempai (Junchio Tanaka)  and Peter Tea of the Aichien Bonsai Nursery. Jun-Sempai is a former apprentice here at Daijuen, which is why I call him Sempai. Sempai is like a superior, a term of respect. Peter Tea (of Peterteabonsai) is from California, and in his second year of apprenticeship at Aichien. Jun-Sempai is also Mr. Suzuki’s son-in-law so we see them quite frequently. Takuya is also Mr. Suzuki’s son-in-law he lives here and studies bonsai as well. When Jun-Sempai and his family come over the men usually spend our time in the workshop, talking and just hanging out. However tonight Takuya was bringing in trees for Jun-Sempai to look at and their visit turned into a bonsai workshop session, which was great!
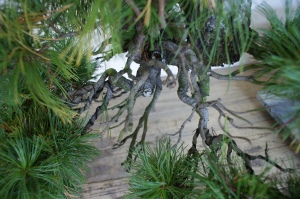
     

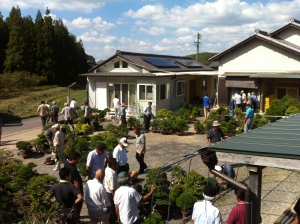
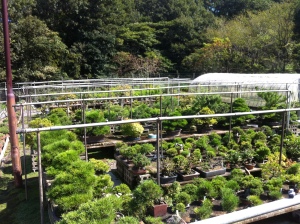
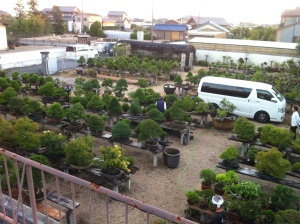
These pictures were taken at Aichien Bonsai Nursery. It’s a big nursery with tons of great material in a wide range of developmental stages. I always enjoy going there.


One of the trees Takuya brought in was this unique little Black Pine tree. After looking at it Jun-Sempai told me to work on that tree. He said it reminded him of an “American tree”. Jun-Sempai is a funny guy (at least he thinks so) and he does take a lot of good-natured shots at me, and everyone else for that matter. However in this instance I think he really meant that the tree was reminiscent of a collected piece of material you would see in the U.S. so he thought It would be good for me to work on. On the other hand it was probably a shot as well :).


Possible front                                                                      Possible back


Bottom                                                                                        Top

This tree has been here for a while and I have always thought it would be a cool tree to work on, so I was excited I had the chance. As you can see it’s an interesting tree, with lots of potential. The tree had two guide wires on it pulling down the largest branch on one side and a part if the jin on the other. Aside from that it didn’t look like much work had been done to the tree. It appeared that the tree had been laying down when it was collected. On the side labeled bottom you can see where there were roots growing down into the soil that had been cut. The tree really bends away from that side as well, as if it was growing up. This major bend and the fact that all those root knobs were unattractive made it pretty obvious this needed to be the back side of the tree. The part labeled top will now be the front of the tree.

While Jun-Sempai and Takuya started working on another tree Peter and I started looking over the pine. We both agreed it was a unique Black Pine, and because of that the usual rules for styling could be, and should be bent in this case. It was Peters thought that you couldn’t take a piece of unconventional material like that and just create traditional style black pine foliage pads. “It just wouldn’t look right” he said. So I took his advice and we discussed style options, rotating the tree, changing the angle and trying to find the position that accentuates the trees best qualities.


It seemed like this was the best option for the angle of the tree. It put the jin at the top at a realistic angle, as if the top of the tree had been broken off. The lower part of that jin fills in the open space on the right side nicely as well. The next step was to refine and define the dead wood. Typically on Black Pines there is not a lot of dead wood, especially here. However again Peter reminded me that this was not a typical tree and that some additional dead wood might work in this situation. He suggested that maybe we could consider an exposed root style with the two roots on the right side. After examining the tree it seemed like those two roots were not really feeding the tree and may already be dead. I started removing bark starting at the top where the existing jin was and worked my way down. I didn’t get to far when we realized that the wood was alive. We decided it would still be safe to run the deadwood down but only incorporate one of the roots at this time.  I also felt that the existing jin needed to be thinned out in a few areas which was done at this time as well.


Now that the deadwood was finished we turned our attention to the branching. First up was the large branch that came down off the left side of the tree. I didn’t plan on moving this branch much because I liked the angle in which it came off the tree. Once again Peter was there to push me to think outside the box and make a major bend to the branch. He encouraged me to have the branch mimic the trunk line and then have it flow out away from the tree at the bottom. This would certainly make for some dramatic movement. Using a guide wire I pulled the upper part of that branch in towards the trunk line  Then using wire at the bottom I was able to pull that foliage pad back out away from the trunk.


I continued wiring the primary and secondary branches after that.

Meanwhile…….

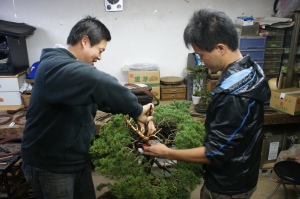
Peter and Takuya were making a major bend on a large jin on his tree. Peter is on the left, Takuya on the right.


     Jun-Sempai directing traffic from his chair, keeping the mood light.

Back to my tree……


About 10:30pm Jun-Sempai, and Peter had left and this is as far as I had gotten. The tree is starting to take shape and all the major bends have been made. The refinement will have to wait for another day, 16 hrs was enough today.

It took several days for me to get back to working on the tree, sometimes that happens around here. Once I did I continued with the fine wiring starting at the bottom and working my way up. As I approached the apex of the tree my gut reaction was to pull the apex back towards the top jin, to the right. I felt this would give some balance to the tree because it was leaning so far to the left. Then I heard a little voice in my head saying “think outside the box”, it was Peter. I then realized that the top jin was one of the main features of the tree and carried enough weight and visual interest to balance the tree on its own. I then pulled the apex down to the far left and was able to create two new layers of foliage with it. I think it was the right choice for this particular tree and I’m glad I went that direction, with a little help from the voice in my head. It happens here a lot, not the voices so much…..but that progression. That next step forward, that next level of understanding, that light that goes on. It’s an awesome feeling and what drives me to be here doing what I’m doing.


The main structure is set and now the tree needs some time too develop. At some point in the future the second root can be exposed, and will add additional interest to the tree. Very special thanks to Peter and Jun-Sempai for all your help and for a fun night in the workshop. Hopefully we’ll get to do it again before I leave. I hope you all enjoyed sharing one night (and a day) in the workshop with us. Thanks for reading!
Posted in Uncategorized | 1 Comment

The Other Side of Things

The other side of Things

As you would imagine the majority of the work around here is on the trees in the nursery, and it is. However there is another side to the bonsai lifestyle at Daijuen that takes us outside the walls of the nursery, but never too far from more bonsai trees. Attending auctions, exhibitions (big and small) and working on trees at customers houses are also a part of the duties here at Daijuen. In this post I will give you a little behind the scenes tour of some of our trips in the last two months.  Hope you enjoy.

Auctions

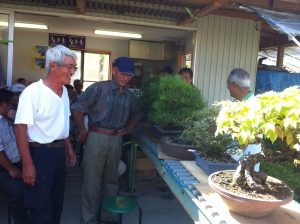
There is a local group of bonsai professionals that meets once a month for an auction in the Nagoya area that we always go to. There are also periodic auctions in Tokyo that Mr. Suzuki goes to as well. I had the pleasure of going to one of those on my last trip here, it was quite impressive. These are far bigger auctions, and draw a much larger crowd of professionals.

For the local auctions anywhere form 25-40 people usually show up and just about everyone brings items for sale. Depending how many people show up there can be a couple hundred trees in them, as well as pots, stones, compliment plants and even fruit being placed on the blocks. The auctions are fun, but as an apprentice it means a full day/evening running trees all over the place. First we assist everyone with the unloading of their trucks when they arrive. Then once the auction starts each tree, pot, stone etc is brought to the auction block and once purchased the item is run off to a designated pile for each person attending. Many of the trees are large and heavy, it’s and exhausting day.  Then when the auctions are over we help everybody load up their trucks with what they have purchased.


Trees going in                                                               Trees coming out


After the auction everyone checking out their piles, paying for what they bought


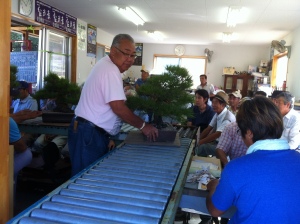
The auction site rotates each month to different members nurseries.These are from the site of another auction one evening. It’s great to get to see all these other nurseries and the professionals that operate them. They are a close nit bunch, and it’s fun to be around them. There is always food, drinks and a lot of laughs.

Exhibitions

There has been a bunch of small to midsize exhibitions since I have returned.  These exhibitions are not  just for bonsai professionals like some of the large ones. These exhibitions have some local hobbyist in them and a few professionals as well. Before these shows there is a fair amount of pre-show business that takes place here at the nursery. All the trees are cleaned up for the shows, moss is placed and pots are cleaned and oiled. For the Larger Exhibitions like Meifu-Ten, Kokufu-Ten and Taikan-Ten the trees are changed from their growing pots into show pots. Theses are often antique Chinese pots that are very beautiful, and very valuable. However for these local shows the pots are not changed. The next step is matching the trees and the stands. Usually this a process of elimination. Mr. Suzuki may try a tree on several different stands before deciding. Width, height, color and style are all considered when making this decision. This is a great learning opportunity for me. Matching stands with trees and choosing compliment plants are all part of the process of exhibiting trees properly. Creating the right feel for each tree is important. A good display will lead your eye around it and show the best attributes of a tree. Everything around the tree should compliment it and enhance the display, without taking away from the tree itself. It’s  great to watch him work and study each display long before it ever hits the exhibition table.The care and attention to detail is the same no matter how big or small the show may be, another great lesson.

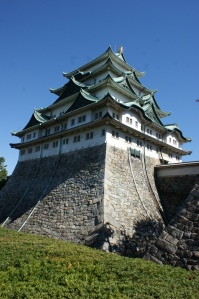
NAGOYA CASTLE SHOW


Nagoya Castle

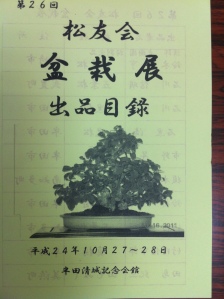
LOCAL SHOW

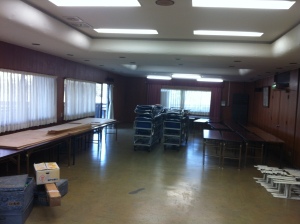
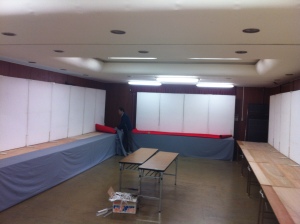
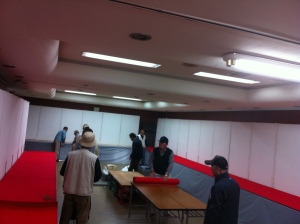
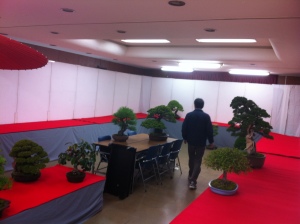
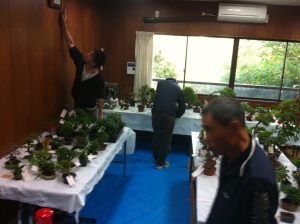
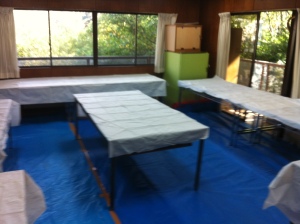
For the larger shows there are event staff the set up and break down the display area. By the time we show up all we need to do is find our designated spot and set up our display. However at these smaller local shows we do everything. Here are some pictures of a room being transformed into an exhibition area.


                                                           The room before

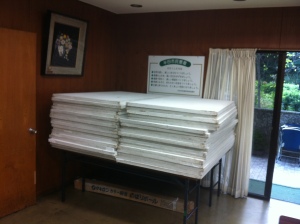
They have got this down to a science. Everything is super organized. All the plywood boards are cut to fit the tables, the skirts are neatly folded and ready to go. The felt is rolled and tied, the backboards and brackets are stacked by the door. Tape, twine and any other accessories needed are all available.


     Once the room is set we start bringing in trees and Mr. Suzuki starts decides where they should go. This is yet again another learning experience watching Mr. Suzuki set up a show. It’s great to see where the trees are placed, and which trees are placed next to each other. It’s quite the process. He is really setting the tone and the flow of the whole exhibition. With the placement of each tree he is leading the visitors around the room without then even knowing it. Once again the care and attention to detail are of the utmost importance.


Always a last minute adjustment to be made


small vending area

The Trees


We have been to a couple of smaller shows like this. These are mostly hobbyist but they still bring nice trees to the show. I am looking forward to the Taikan-Ten show in Kyoto next month. Taikan-Ten is one of the largest shows in Japan and brings professionals from all over the country. Can’t wait!

Customers Houses

Here are a few photos from various customers’ houses. I don’t bring my camera when we go off to do work but I usually manage to snap a few pictures with my phone of some trees and other things of interest. I love how the yards are landscaped and take a lot of pictures to use for ideas in my own yard.


Fu-Sempai and the gardener pruning a landscape tree at a customers house, Safety first! This large and very old Black Pine is pruned much in the same way that the bonsai are. Last years needles are plucked, candles are reduced and unnecessary branches are cut.  These old trees are amazing, and it can take days to prune them.


I hope you have enjoyed this little tour into our life on the road. There are just to many pictures to really do any of this justice so i’ll plan on putting together another post like this before I go. Keep an eye out for more tree posts this week, and those of you on the East Coast of the USA tuck away your trees and be safe during the storm, good luck! As always thanks for reading!

Posted in Uncategorized | 2 Comments

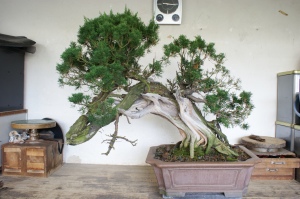
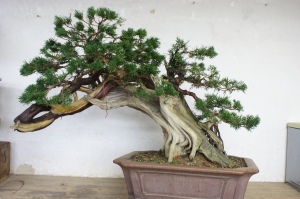
Tosho needle juniper (Juniperus rigida) (Part 1)

Tosho (part 1)

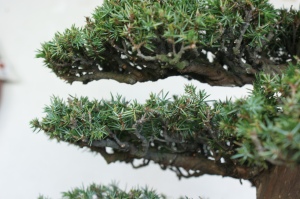
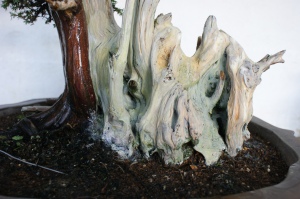
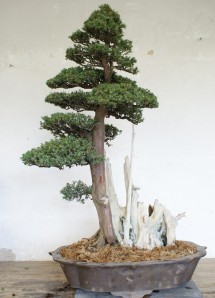
I was given this Tosho needle juniper (Juniperus rigida) to work on. As you can see this tree is in pretty good shape and is in need of little refinement. The main part of my work will be done to the dead wood.

(front)                                                                                      (right side)


(back)                                                                                   (top view)

I thought the dead wood as a whole had some great potential. There was some good movement and a lot of depth to work with in most areas. However the right side was area of concern for a couple of reasons. There once was a huge branch there that was cut leaving a flat area with little natural character. The wood had started decaying and had a cork like texture to it, which would have to be removed down to solid wood. At the top there is also a large bulky chunk of wood that will need to be removed.

The work begins with the angle grinder as I remove the bulk of the decaying wood and make my initial cuts throughout the remainder of the dead wood. Before starting I come up with a plan and will often use a marker to draw on the spots I want to carve. There is no turning back once the wood is removed so a well thought out plan really helps. This piece was not that complicated and I really tried to accentuate the movement that already existed. When carving the right side, I first removed the chunk on the top and then carved out all the “corky” material. I then started to add some interest with depth and movement.


(front)                                                                    (right side)

(back)

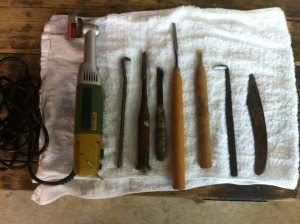
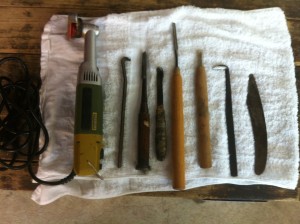
Once the rough carving was done, it was time to refine and smooth things out. There is a limited amount of dead wood work done here at Daijuen so as you can see the carving tools are not exactly state of the art. There is no Dremel tool or craving bits of any kind, so the majority of the work is done with hand carving tools and sand paper. The main goal of this work is to make the initial grinder cuts look natural. Using the grinder cuts as a template, more subtle and flowing movement is created with the hand tools. All the sharp, hard angles and curves are smoothed out and softened with the sand paper. I try and imagine how natural tears and breaks in the wood would happen, paying attention to the movement of the woods grain. If it’s obvious you have cut across the grain it will seem unnatural.


Now that the dead wood is finished I can clean up the live bark of the tree and remove any needles that are growing above the pads. I am also cleaning any growth on the under sides of the branches. In a mature tree any growth under the dense pads would be shaded out and die. Seeing the branch under the pad is a sign of a mature tree and gives a nice clean look. It’s important when cutting the long growth off to get the tip of your scissors into the stem and snip it. If you cut straight across the stem you can cut other needles that will later brown and be unsightly.


After this light pruning the dead wood was treated with lime sulfer and the job was complete….. for now.

(front)                                                                            (right side)


(top view)                                                                        (close up of the front)

I didn’t plan it but the front view kind of looks like a skull, and I dig it! The top view of the right side kind of looks like a mountain range, didn’t plan that either. The main goal was to create depth, movement and interest. I hope that I achieved that. Mr Suzuki seamed please with my work.

I really enjoy doing dead wood work because it gives me another avenue to be creative. I hope you enjoyed reading about it. Thanks for following along as my time here rolls on in Japan.

If you have any questions or want to share any of your dead wood work,or stories please feel free to do so. I would love to hear about it.

Posted in Uncategorized | 3 Comments

Shimpaku Juniper

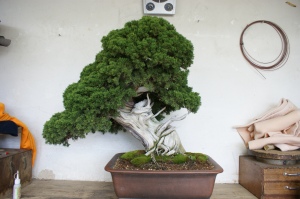
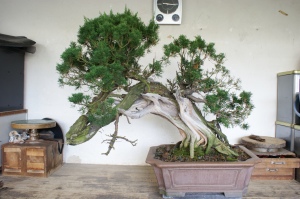
One of my next tasks here was working on this Shimpaku Juniper (Juniperus chinensis). In a nursery filled with pines (black, white, and five needle) this Large shimpaku is a unique piece of art. The movement, elegance and dead wood are very different than the powerful, stocky pines that fill the benches here at Daijuen.

      .
(Shimpaku)                                                                             (White Pine, a monster)

This tree has been here at Daijuen for two years and from what I can gather was collected some time ago. Shimpaku are native to Japan and make great bonsai. Unlike pines who’s rough, thick bark are a primary characteristic of a quality tree, juniper bark is typically kept clean an smooth. They also typically have a great deal more dead wood than pines. The contrast of the whitish/grey dead wood and the rich color of the bark make for a very striking contrast. Combine that with its bright green scaly foliage and you have the makings of a great bonsai.
First, the tree is in need of being cleaning up, and there are some dead branches that will be jined as well.


The dead branches are shortened considerably; any remaining bark is removed down to the hard wood and they are cleaned off. Considering the amount of dead wood that already exists and more importantly the area in which these branches are located the jins are kept short and quite simple. After this, all the remaining dead wood is brushed, cleaned and later lime sulfur will be applied to preserve the wood.


After the jins are completed I can start work on the live bark. I remove the exfoliating bark by using a knife to gently get under the flaking pieces, secure with my finger and then pull the bark off in strips. The surface bark comes off quite easily and goes fast at first. There are also smaller thinner pieces that lie underneath. The same technique is used here being careful not the damage the underlying bark. The cambium is right beneath this dark reddish/brown bark, so be careful not the damage it. Once this is done I took a toothbrush and water and brushed all the bark off to clean it. Once it’s been cleaned you can really see the “live vein” pop against the dead wood.


(before)                                                                                 (after)

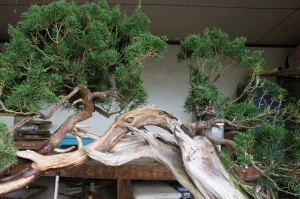
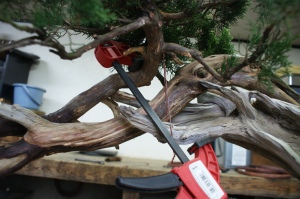
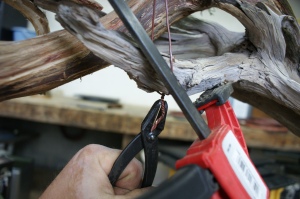
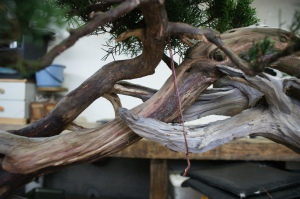
Looking at the tree it is obvious to see that two foliage masses are a bit disjointed and the main foliage mass is too far from the center of the tree. The tree needed to be more compact. I was able to achieve this using a large clamp and a guide wire. I used the clamp to slowly and carefully pull down on the branch while I tighten the guide wire which is attached to a nearby jin. Doing this brought that portion of the tree back into the composition, making the tree more compact and producing some much needed unity between the two foliage masses.


The remaining part of the work was wiring all the branches and setting them into place. The objective here was to set the framework of the tree, not to create a finished product. I wanted to put the primary branches into place and fan out the secondary branches to let as much light into the tree as possible. A number of the branches were weak and in some areas branching was sparse. Most of the inner new shoots were left so that in the future a number of the weak branches can be cut back to those smaller shoots. This will produce healthier, more compact branching and tighten the foliage mass. This is most evident at the apex, where the branches are weak and far too long. Next year this tree will get cut back to the new growth which will be the first step in the refinement process.


See how with the picture on the left it almost feels like the tree is going to fall over onto it’s “elbow”. With the new design and that main branch pulled down it’s much more centered and the tree seems much more stable and balanced. It’s a much more compact desing and the two foliage masses flow together. With so many refined trees here at Daijuen it is a real treat to get to work on a tree like this. It’s nice to have more of an influence on where the future of the tree goes, and get to make some changes that have an real impact. I really enjoyed this one.

I hope you enjoyed the post, if you’d like to see more click the “follow” button on the lower right side of the scree and follow my journey over the next few months and beyond.

Posted in Uncategorized | 5 Comments

Five Needle Pine (Pinus parviflora)

One of my first challenges this week was working on a Japanese five needle pine (Pinus parviflora).

Japanese Five needle pine or “Goyo Matsu” is one of seven pines native to Japan. It can be grown in all bonsai styles except broom style and has a number of characteristics sought after in bonsai including rough bark, compact growth habit and short straight needles. These pines are sun loving and require full sun exposure ( 6 hrs or more) for best growth. Like most pines, Japanese five needle pines like well draining soil with a ph around 6.5. The addition of mycorrhiza to the soil is beneficial to the trees health. Mycorrhiza is a beneficial fungi that has a symbiotic relationship with a number of plant species but is most common in pines. It’s really an interesting relationship and worthy of an in depth explanation in a future post.

The tree I was given was in need of some restyling due to the loss of the first branch, a major component of any tree.

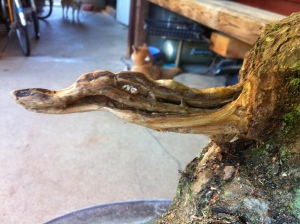
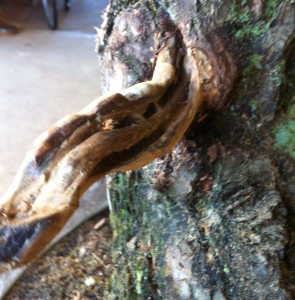
The first order of business was to “jin” the remaining piece of the dead branch. First the bark is removed and then the wood can be carved.


I used a grinder in the initial phase of this simply to remove the bulk of the excess wood. Then hand carving tools were used to finish the job.


My goal was to create an interesting jin with depth and movement that was subtle enough not to steal attention from the design.  Some of the wood had already started decay, and was soft. This would need to be removed first before I started carving on the solid wood. This decay helped direct the approach I took in creating the jin. Once the carving was finished I used a wire brush to clean the area, and some fine sand paper to soften up any sharp edges to give it a more aged appearance. Smooth edges are an indication of age, as if weather and time have worn down the wood. Sharp edges make the wood seem fresh, as if it had recently broken.


Some artist will use a torch to remove fine wood pieces and achieve this aged look as well. After torching, a wire brush removes any chard wood and helps to smooth out the edges. I like this technique but that approach is not used here.

Once the jin was done the next step was to move the new first branch (on the left)  down and fill the void left by the old one.

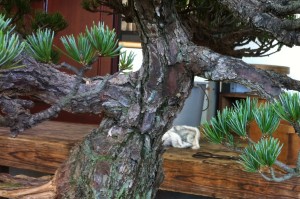
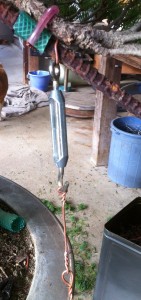
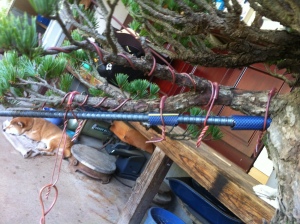
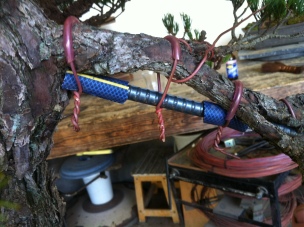
At first glance it is easy to see that this branch is far too thick and strong to bend using conventional wiring techniques. The preferred method of bending a branch this size is by attaching a piece of rebar (reinforcing bar) to the branch which will enable us to bend it safely and effectively.


The rebar is placed under the branch and attached with wire in several places. Both the rebar and wire have rubber on them to protect the bark on the tree from damage. The more contact points with the branch and the rebar the better. This will help distribute the stress of the bend over a greater distance.There are four points of contact on this branch.

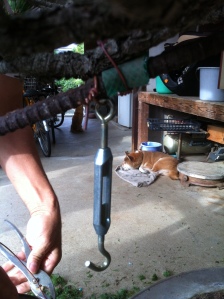
We are using a piece of wire attached under the pot as an anchor point.  There is also a piece of guide wire attached to the rebar that will run to the anchor point. For this job we will place a turnbuckle in between the guide and anchor wire. This will enable us to have better control as we pull the branch down. There is a second guide wire being used on the newly formed jin to help support to branch as we pull it into place.


The next step is to grab the rebar by the end and slowly start bending it into place. As we pull down on the branch we tighten the turnbuckle and guide wire as we go. It helps to have a second pair of hands during this part. Take your time and allow the branch to “rest” periodically if you need to.  Giving the branch time to rest ( about ½ hr) will allowing the tension in it to release, so you can move it further into place safely. If you try and pull a large branch into its desired place with one movement you are more likely to do damage to the branch and even snap it. Using the turnbuckle will also allow you continue to bend the branch into place over an extended period of time if you need to. Simply give it a few turns every month or so and you can safely move large branches over time.

In this instance we were able to fully close the turnbuckle, keep the second guide wire tight on the jin and get the branch into place in one session. When we started the branch was 17 inches from the surface of the soil. When we finished it was 9 inches from the soil, cutting our distance nearly in half.

We then turned our attention to the second branch and used the same techniques to bend that one. This branch was not nearly as thick so we simply used one guide wire and no turnbuckle. It moved into place nicely and we were able to dramatically lower that branch as well.

(Left) Back view

(Right) Guide wire on rebar to anchor wire attached under the pot


All that was left was to wire some of the secondary branches into place to fill in the voids left by moving the first two primary branches.

This work was just the first step I bringing this tree back into shape, and all we will do at this time. The wire and rebar will stay in place for a least a year. At that time it will be removed and some much needed refinement work can be done. There is no need to stress the tree any further at this time trying to wire every branch. Remember bonsai is an art of patience and causing the tree any more undue stress at this point would only set you back further in its development. In a year  the tree will be fully recovered, the branches set and it will be ready for the next step. I had a blast working on this tree and I hope you enjoyed reading about it.

If you would like to follow along with future post click the “follow” tab on the screen. Thanks for reading.

Posted in Uncategorized | 4 Comments

Back at Daijuen

I have returned to Daijuen and will be continuing my training for another 3 months here in Japan. I am looking forward to learning as much as possible and taking my bonsai skills and understanding to a new level.

It was an eventful few months back in Maryland since I left Daijuen last April. The Potomac Bonsai Association kicked things off with its annual Spring Festival in early May. This festival is held at the National Arboretum in Washington D.C..The Arboretum is a great venue and is home to the National Bonsai and Penjing Museum. The museum has three amazing pavilions, with bonsai from Japan, China and North America. This tremendous collection is truly a national treasure!


In early June I went up to the National Bonsai Exhibition in Rochester New York for the first time. I was very impressed with the quality of the trees in the show. There were tree entries from all across the country with a wide range of trees species and styles. There was a vending area and Marc Noelanders did a demo the afternoon I was there. It was a great time, Bill Valvanis and his staff put on a first class event. We also got a chance to visit Bill’s nursery, which was a real treat.

Shortly after the National Show I had the opportunity to give a talk/demo on tropical bonsai at Valley View Farms Nursery in Maryland. The talk went well, and the crowd was eager to learn. After discussing the tropical bonsai that Valley View Farms sells and how to care for each of them I created a 13 tree forest using Ficus solicifolia trees.  The forest turned out nicely, everyone seemed to learn a lot and had a fun doing it. Thanks to Valley View for the opportunity to teach there.

In late June I attended the Rocky Mountain Bonsai Convention in Denver Colorado, one of my favorite places. I was there not only to attend the conference but to compete in the Joshua Roth New Talent Competition. This completion is for people with 10years or less experience in bonsai. You are given a piece of stock material and 8hrs to complete your tree. It was a great event, with nice material. Though I did not win the completion I was very pleased with the tree a created and received some good feedback from the judges. The conference had some fantastic speakers and amazing collected Rocky Mountain material for the workshops. It was great to see a mix of International bonsai artists Ryan Neal and Marc Noelanders, as well as prominent local bonsai figures Harold Sasaki and Larry Jackel teaching. John Kirby also had a great workshop/lecture on black pines, his specialty. It was one of the best conferences I have ever attended.

While I was there the Denver Botanic Gardens also had a grand opening of its new bonsai collection.  Done in true Colorado fashion the display is a great combination of the beauty of the Rocky Mountains and the amazing art of bonsai. Larry Jackel, curator of the collection and the team at the botanic gardens had the collection and the grounds looking awesome for the event.


In addition to these events there was still plenty of bonsai learning to be done. I continued my training with my weekly trips to the National Arboretum bonsai collection to volunteer as well as many Baltimore Bonsai Club events, and my study group.  I even had some time to work on my own trees.

Please follow along with me the next three months as I share my experiences and what I’m learning here in Japan. Thanks for reading.

Posted in Uncategorized | 1 Comment

My Philosophy on Bonsai

My philosophy on bonsai is that bonsai is more than just roots, nabari, trunk, branches, and foliage. Obviously all those things make up a bonsai tree but there is more. Bonsai is a feeling, a feeling you get when you see a tree that moves you. The feeling you get from creating a piece of living art and seeing it thrive. It’s seeing the positive features in a tree and accentuating them. It’s not about evaluating every tree to death. It takes more than knowing what a tree shouldn’t be, to make one what it could be. Finding faults in trees as means of evaluating them or showing off you knowledge doesn’t mean you understand bonsai. Actually I think it’s quite the contrary. The rules are in place for a reason and give you a guideline for shape, proportion and scale. Though these things are all very important in producing quality trees, it’s not the end all be all. I am partial to natural trees and tree styles, though I can appreciate any quality material. I am drawn to things you would see out in the real world. Trees that remind me of places I’ve been, like the battered conifers of the Rocky Mountains, the Bald Cypress swamps of the south or the massive Coastal Redwoods in the North West. For me bonsai is about appreciating nature, having a connection with ancient old trees, and centuries old traditions of capturing a little slice of the natural world in a container. That’s what the Chinese had in mind when this whole thing started long ago, and the Japanese have perfected. That’s what I hope to continue in my own collection and to those I have the opportunity to teach.

Posted in Uncategorized | Leave a comment

About Me

Welcome to my blog

My name is Chris Baker and I will be writing about my experiences as an apprentice at Daijuen Bonsai Nursery, and beyond. I’ll be posting about interesting techniques I learn, bonsai shows and events, selected journal entries and everything that being an apprentice has to offer. I have two weeks left in my first 3 months in Okazaki, Japan and hope to return again to continue my bonsai education later this summer. I am originally from Long Island, NY and before moving to Japan I was living in Baltimore, Maryland with my unbelievably supportive wife Marj, and my dog One Five.

Bonsai Journey

I first got involved in bonsai in 2004, when I purchased a friend a juniper bonsai as a gift. I thought it was a cool tree so I bought myself one…and so it began. I was living in Gainesville, Florida (home of the Mighty Gators) and found that there was a bonsai club in town. I soon joined the club and began learning as much as I could about bonsai. It was a thriving club with a lot of knowledgeable members. The state convention was held in Gainesville a year later and I had a chance to see people like Colin Lewis, Jim Smith, Joe Day and other talented bonsai artist at work. I also got to participate in and watch a number of workshops and demonstrations all week-end. It was an eye-opening experience and served to fuel my fire.

Two years later I moved to Baltimore, Maryland to work at the National Aquarium as a veterinary technician. I promptly joined the Baltimore Bonsai Club and continued learning as much as I could. I soon sought out new avenues for learning and landed a part-time job at Meehan’s Miniatures, a commercial bonsai grower about 70 miles west of Baltimore. On my day off from the Aquarium I would ride out and work. This gave me the opportunity to work on many trees in the same day and get far more hands on experience that I could with my own collection. I learned a lot from Martha and Hugh Meehan and I will always be grateful for the opportunity to work at their nursery. Working at Meehan’s also gave me some insight as to how a bonsai nursery is run, and just how much work it was. All information that might come in handy one day.

In the next couple of years I became more and more active in the Baltimore Bonsai Club, holding a board member position, helping out with workshops, demonstrations and many of the outreach events the club put on. I was also attending as many bonsai conventions and events as I could outside the club. I then took a new position at the National Aquarium of Senior Horticulturist of the Rainforest Exhibit, and my horticulture passion continued to grow. It was at this point I realized I needed to make horticulture and bonsai a bigger part of my life. Soon after the Baltimore Bonsai Club was participating in an event at the National Arboretum, Penjing Museum in Washington, D.C.. I introduced myself to the Curator, Jack Sustic. I said “Hi my name is Chris Baker; I have aspirations of working at a bonsai collection one day and would love to volunteer here.” That sentence has altered to course of my life. I started volunteering a few months later and began learning all I could from Jack. One day I was asking Jack if the Arboretum ever took on people for internships or apprenticeships. He said that they did not but if I was serious he might be able to get me an opportunity at a nursery in Japan…..Thanks to Jack; my mentor and friend, 5 months later I arrived at Daijuen in the dark of night and bitter cold knowing my education had reached a whole new level. I hope you follow along in my journey, learn some good tips and enjoy the ride with me.

Posted in Uncategorized | 2 Comments